Fix Leaking Taps Perth
Joel Hunter


A leaking tap problem can lead to long-term damage. Not only can it cause significant damage, but it will also increase your water bill significantly.
You can lose up to 2000 litres of water per year from one leaking tap.
It is not that difficult to fix leaking taps, but you need to check with your local water supply authority before going ahead. It is not legal in certain parts of Australia to change tap washers on your own – a professional is required by law.
Common Causes of Leaking Taps
Worn Tap Washer: Over time, rubber washers deteriorate due to friction and pressure, especially in older compression-style taps. A damaged washer is the most frequent cause of a persistent drip.
Damaged O-Ring: The O-ring creates a seal around the spindle. If it wears out or cracks, water can leak from the base of the tap handle.
Faulty Jumper Valve: The jumper valve regulates water flow when the tap is turned. If it fails or sticks, it may not close off the water properly, leading to drips.
Worn Tap Seat: If the metal tap seat inside the body becomes worn or pitted, it can prevent a proper seal even with a new washer. In such cases, regrinding or replacing the seat is often required.
Corroded Valve Seating: Mineral build-up and corrosion over time can affect the seal and cause intermittent leaks, especially in areas with hard water.
Poor Installation or Over-tightening: Excessive force when turning taps off or incorrect installation can lead to internal damage, causing leaks over time.
Ceramic Disc Failure: In modern mixer taps, ceramic cartridges may crack or wear out, leading to dripping. These generally require full replacement rather than repair.
How to Fix Leaking Taps?
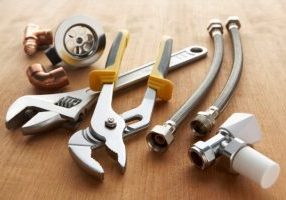
Materials and Tools Required
- Washers
- O-ring
- Tap lubricant (Vaseline or silicone)
- Multi-grips
- Spanner/wrench or shifter
- Needle-nose pliers or small pliers
- Cloth and wire brush
- Basin plug (to avoid losing small parts)
Anything else that you may need can be bought at your local hardware shop.

Step-by-Step Instructions to Repair a Leaking Tap
1. Turn Off the Main Water Supply
By turning off the mains, you stop any water from flowing into your house. If you cannot find the main tap, it could be outside on the street, or possibly in your front garden. If you live in a townhouse or flat, you can normally find the mains in the laundry or the bathroom.
To check that the water is completely turned off, turn on one of your taps to make sure nothing is coming out. If water continues to run, even after turning off the mains, you may need a professional plumber. Use multigrips if the mains tap is difficult to operate due to age or corrosion.
Then, turn on the leaking tap to release any remaining water in the pipe and leave it open. Insert the plug into the basin so no small parts fall into the drain during the repair.
2. Remove the Tap Handle and Flange
Carefully remove the tap handle. The screw is usually located under the hot or cold symbol on the top of the handle. Once the cover is removed, unscrew and lift off the handle.
Next, remove the flange beneath the handle. It may be screwed on or held in place with a spring. Removing this will expose the internal components.
You can now assess what kind of tap you have:
- If the handle rotates more than a half-turn, it likely uses rubber washers.
- If it rotates less than a half-turn, it likely uses ceramic discs.
3. Remove the Bonnet, Spindle and Washers
Use a spanner or shifter to remove the bonnet and spindle. This will expose the washer assembly inside the tap.
The key components to check and potentially replace are:
- The body washer – surrounds the head nut and is typically orange. It is usually easy to remove.
- The O-ring – located on the spindle. Close the tap fully and use needle-nose pliers to remove it. A new O-ring should stretch easily over the spindle.
- The tap washer (jumper valve) – may fall out or need a small push with pliers.
Worn O-rings are a common reason taps leak. Remove all components, then clean the inside of the bonnet and tap housing with a cloth and wire brush.
4. Lubricate and Reassemble
Before reassembling the tap, apply waterproof lubricant to all washers and moving parts. This ensures smooth operation and reduces wear.
Refit the spindle and bonnet, tightening gently to avoid damaging the seat. If needed, apply a small amount of silicone to the body or flange.
Replace the flange, screw the handle back in place, and reattach the cover.
5. Turn the Water Supply Back on
Make sure the tap is left in the off position. Slowly turn the main water supply back on.
Once the mains are on, test the tap. Open and close it gently. Use only enough force to stop the water flow – do not overtighten, as this can damage the tap seat.
If the tap continues to leak, the seat may be “pitted” and require regrinding by a professional plumber.
There you have it – how to fix leaking taps in five simple steps.
Need Help Fixing a Leaking Tap? Contact Us
If you get stuck or don’t have time, get in touch with Drip Hunters, and we will be able to help fix your leaking tap and address any underlying issues which may have caused the leak. Call 0439 922 548.

Why Choose Us for Repairing Leaking Taps?
- Our experienced team services areas from Perth to Mandurah and carries standard parts for most tap types.
- Fully licensed and insured, we comply with all plumbing regulations, ensuring safety and legality in every repair.
- Transparent pricing, no hidden fees, and professional, prompt service to stop leaks quickly and prevent damage.
Related Articles:
- Signs of Hidden Water Leak in Perth Homes
- How to Claim a Water Bill Rebate in WA After a Water Leak
- Water Leak Insurance Claims: What’s Covered and What’s Not
Locations We Service
- Port Kennedy
- Rockingham
- Baldivis
- Golden Bay
- Karnup
- Secret Harbour
- Warnbro
- Safety Bay
- Mandurah
- Kwinana
- Singelton
- Waikiki
- Lakelands
- Serpentine
- Meadow Springs
Some of our Plumbing Work


Reviews


